Quick Start Guide
Get up and running with DocRouter in minutes. This guide walks you through the complete workflow from document upload to automation.
Overview
DocRouter transforms your document processing workflow through these key steps:
- Upload your first document
- Configure a tag, schema, and prompt
- Run the prompt on tagged document(s)
- Prompt Engineering to improve extraction quality
- Manual Automation using bulk actions
- Full Automation with REST API or Python SDK
Start by uploading a file and verifying it processed.
Manual Upload via Web Interface
- Navigate to app.docrouter.ai
- Click "Upload Document" or drag and drop your file
-
Supported formats:
PDF DOC XLS CSV TXT PNG JPG
- Skip tag or metadata assignment. Wait for the upload confirmation.

Upload screen: drag-and-drop files, then select Continue.
Verify Processing in Document List
- Open the Documents list from the left sidebar.
- Wait until your document status becomes
llm_completed. - Click the document name to open and view the results.
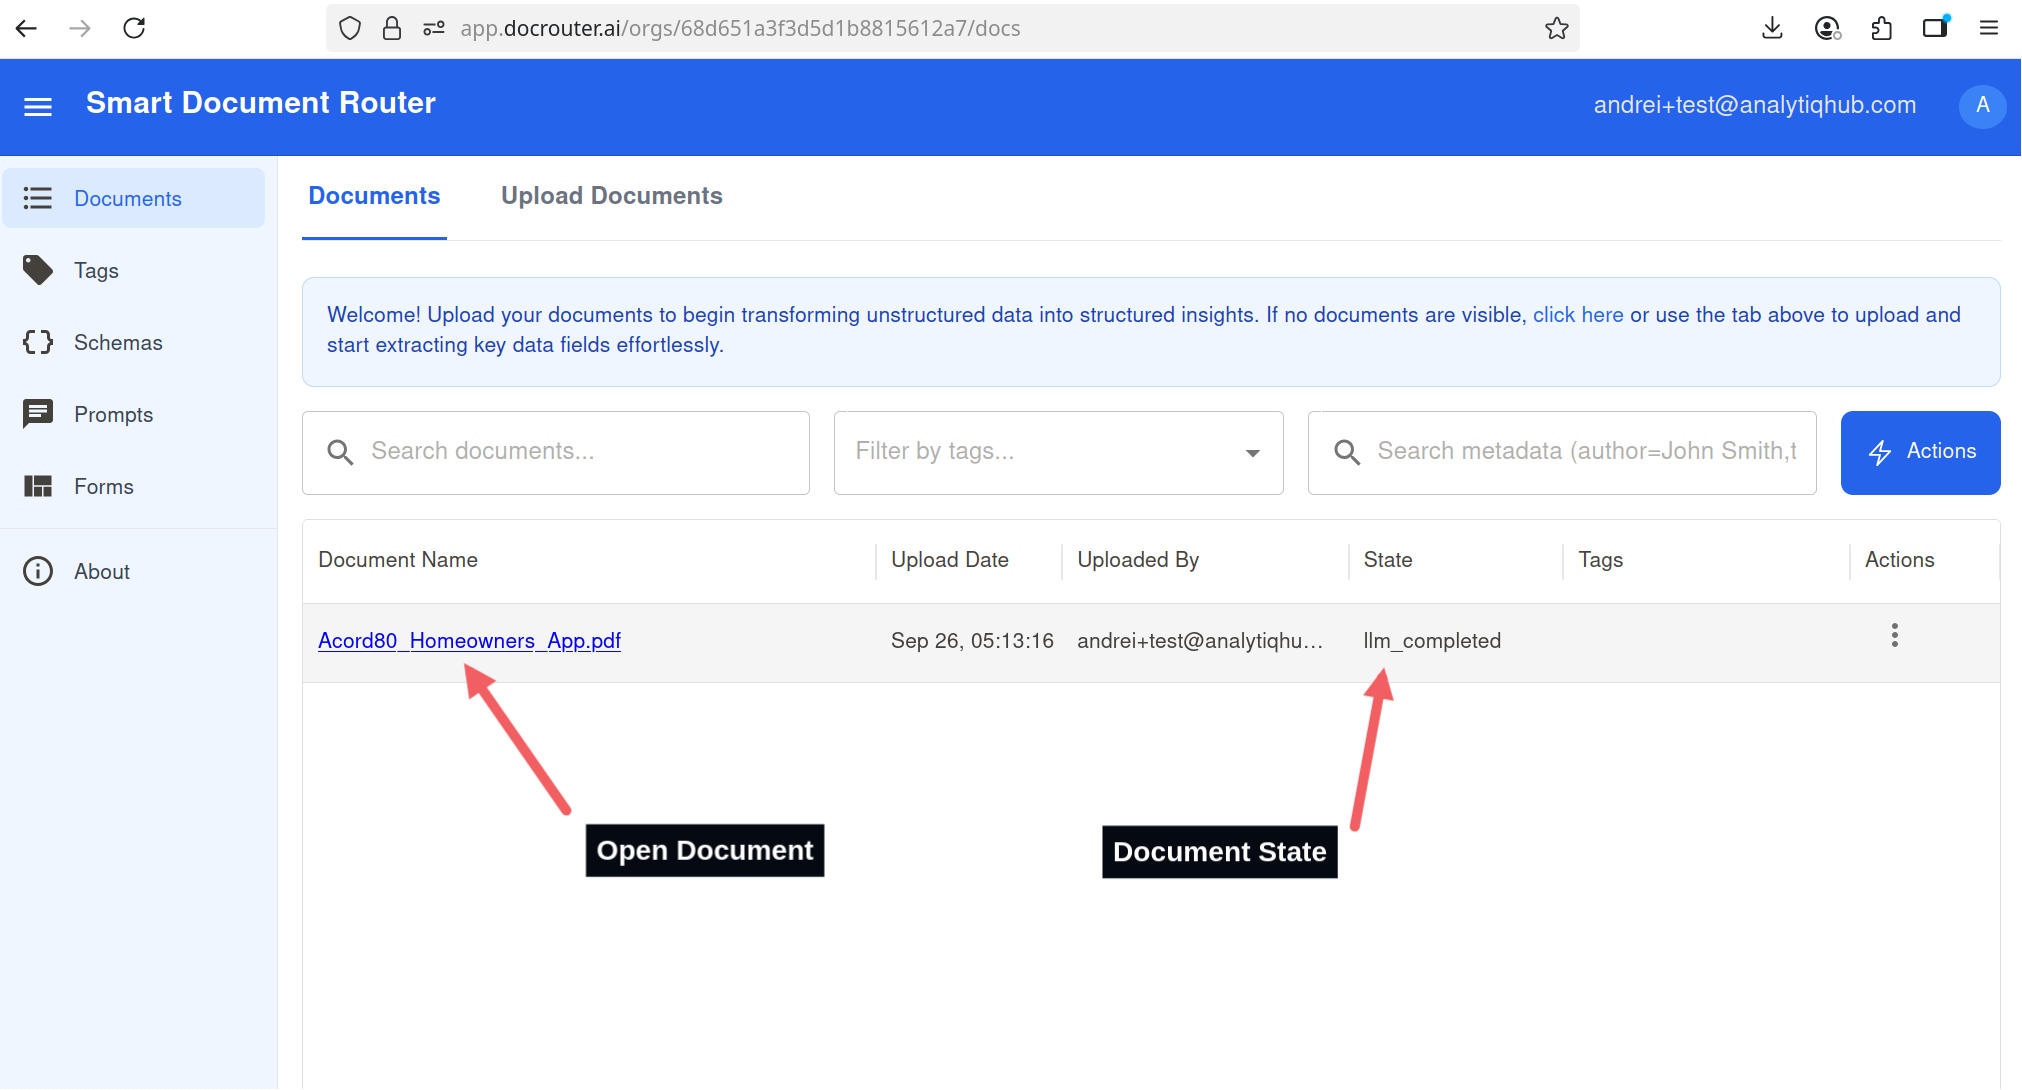
Documents list: wait for status llm_completed, then open the document.
Review the Document
- On the document page, use the viewer to page through the file.
- Initially, only a Document Summary is extracted.
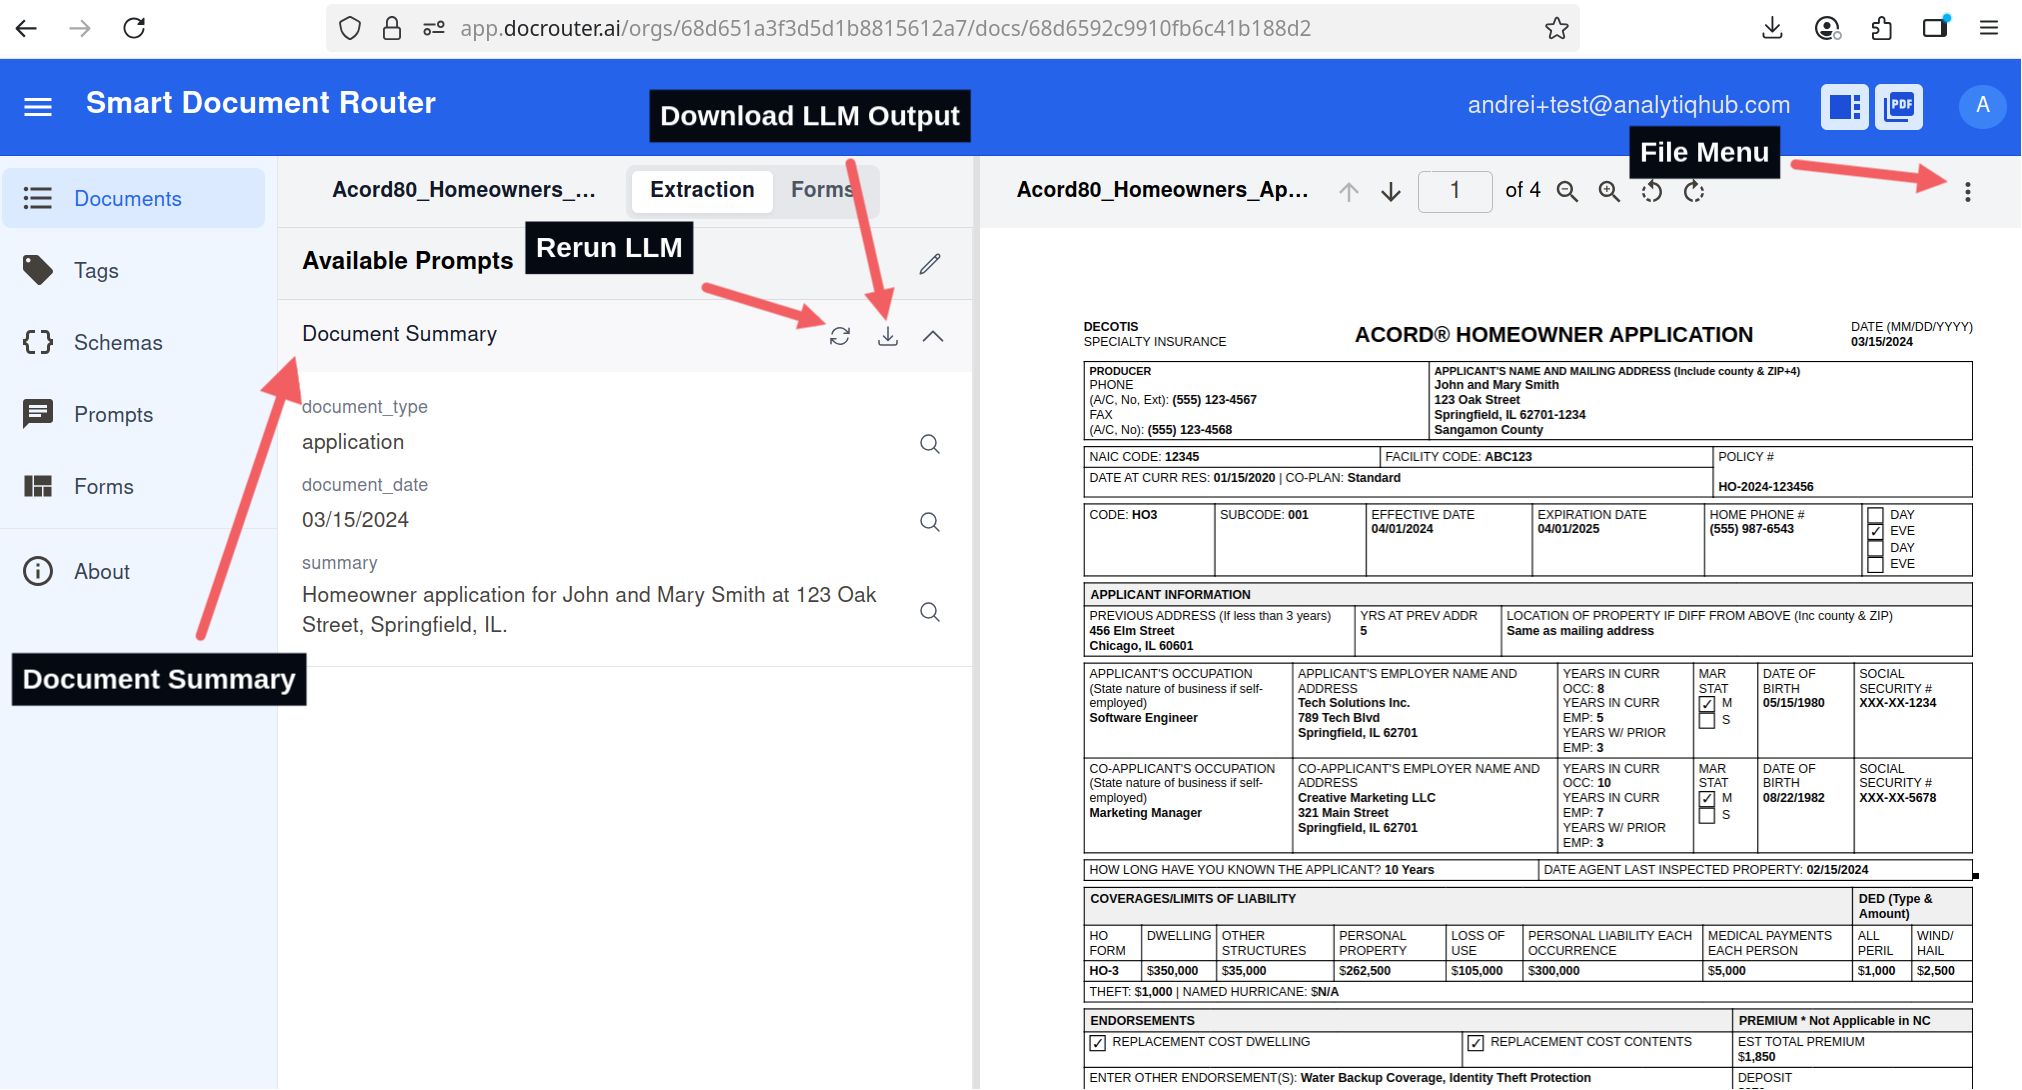
Document review: navigate pages and inspect extracted fields.
To prevent running all the prompts on all the documents, we use a tag mechanism to assign which prompts run on which documents.
Create a Tag
- Go to Tags in the left sidebar.
- Click Create Tag.
- Enter a descriptive tag name (e.g.,
invoice). - Click Save tag.
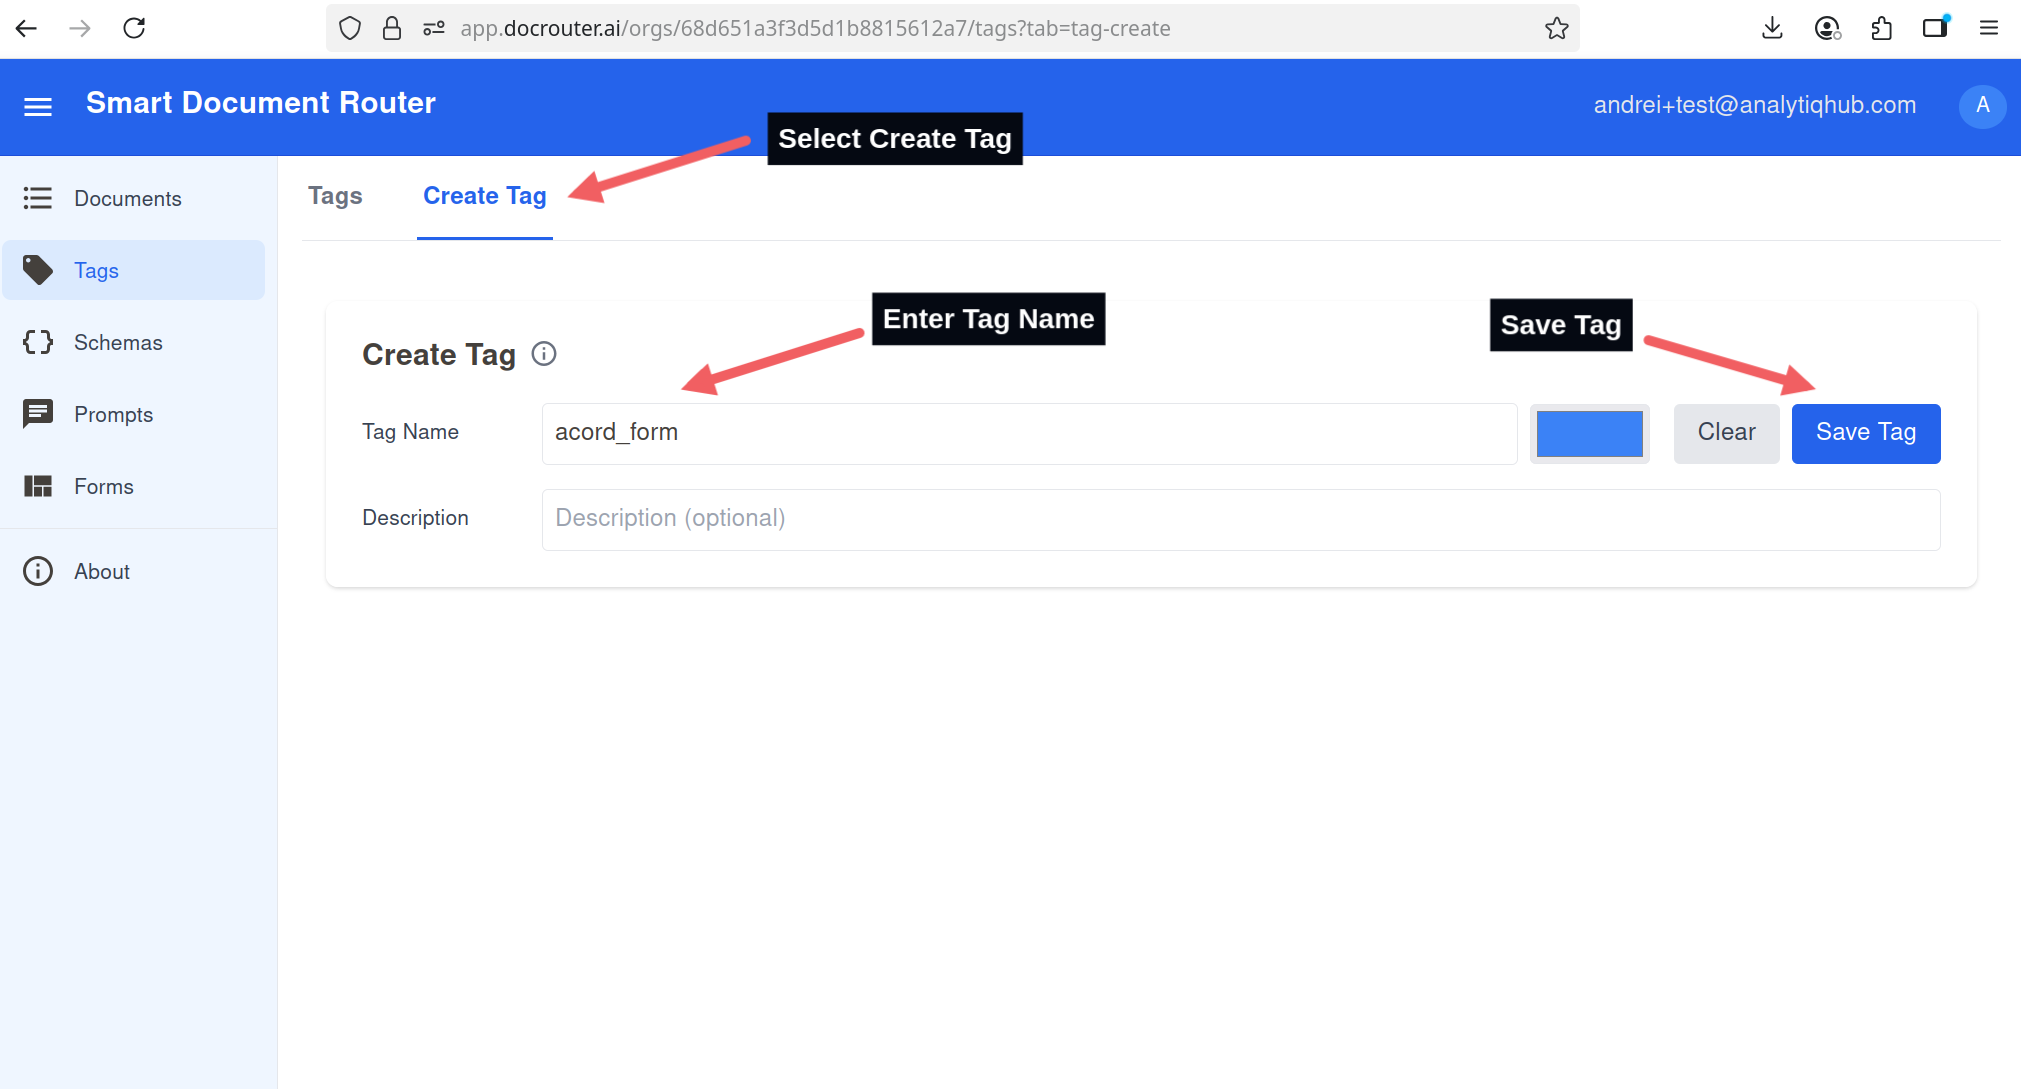
Create a new tag to scope which prompts run on which documents.
Create Schema (Drag & Drop)
- Go to Schemas in the left sidebar.
- Click Create Schema.
- Set schema name
- Add schema elements.
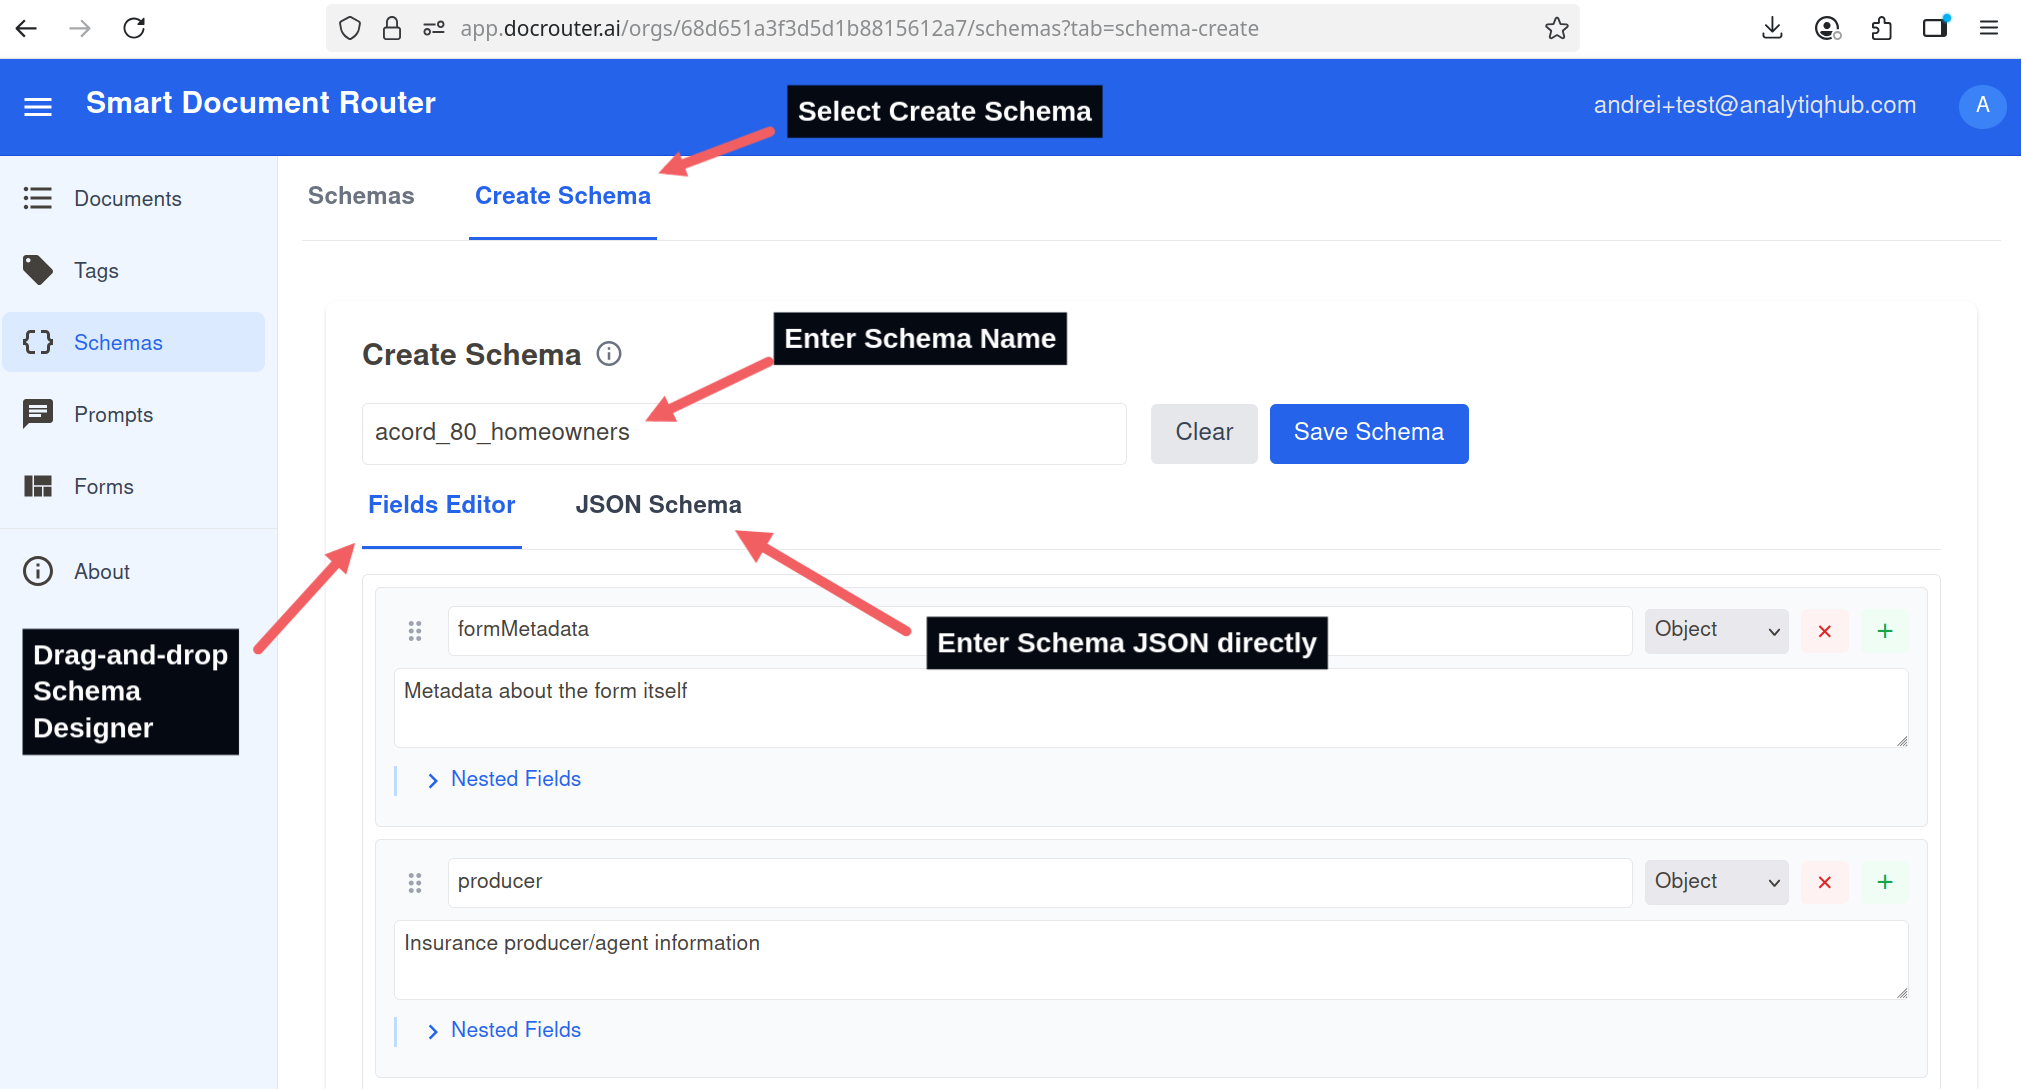
Use drag-and-drop to start a schema from a sample document.
Create Schema (JSON Editor)
- Open the JSON tab in the schema editor.
- Paste the contents of the downloaded schema file (acord_clearance_search_schema.json).
- Click Save Schema.
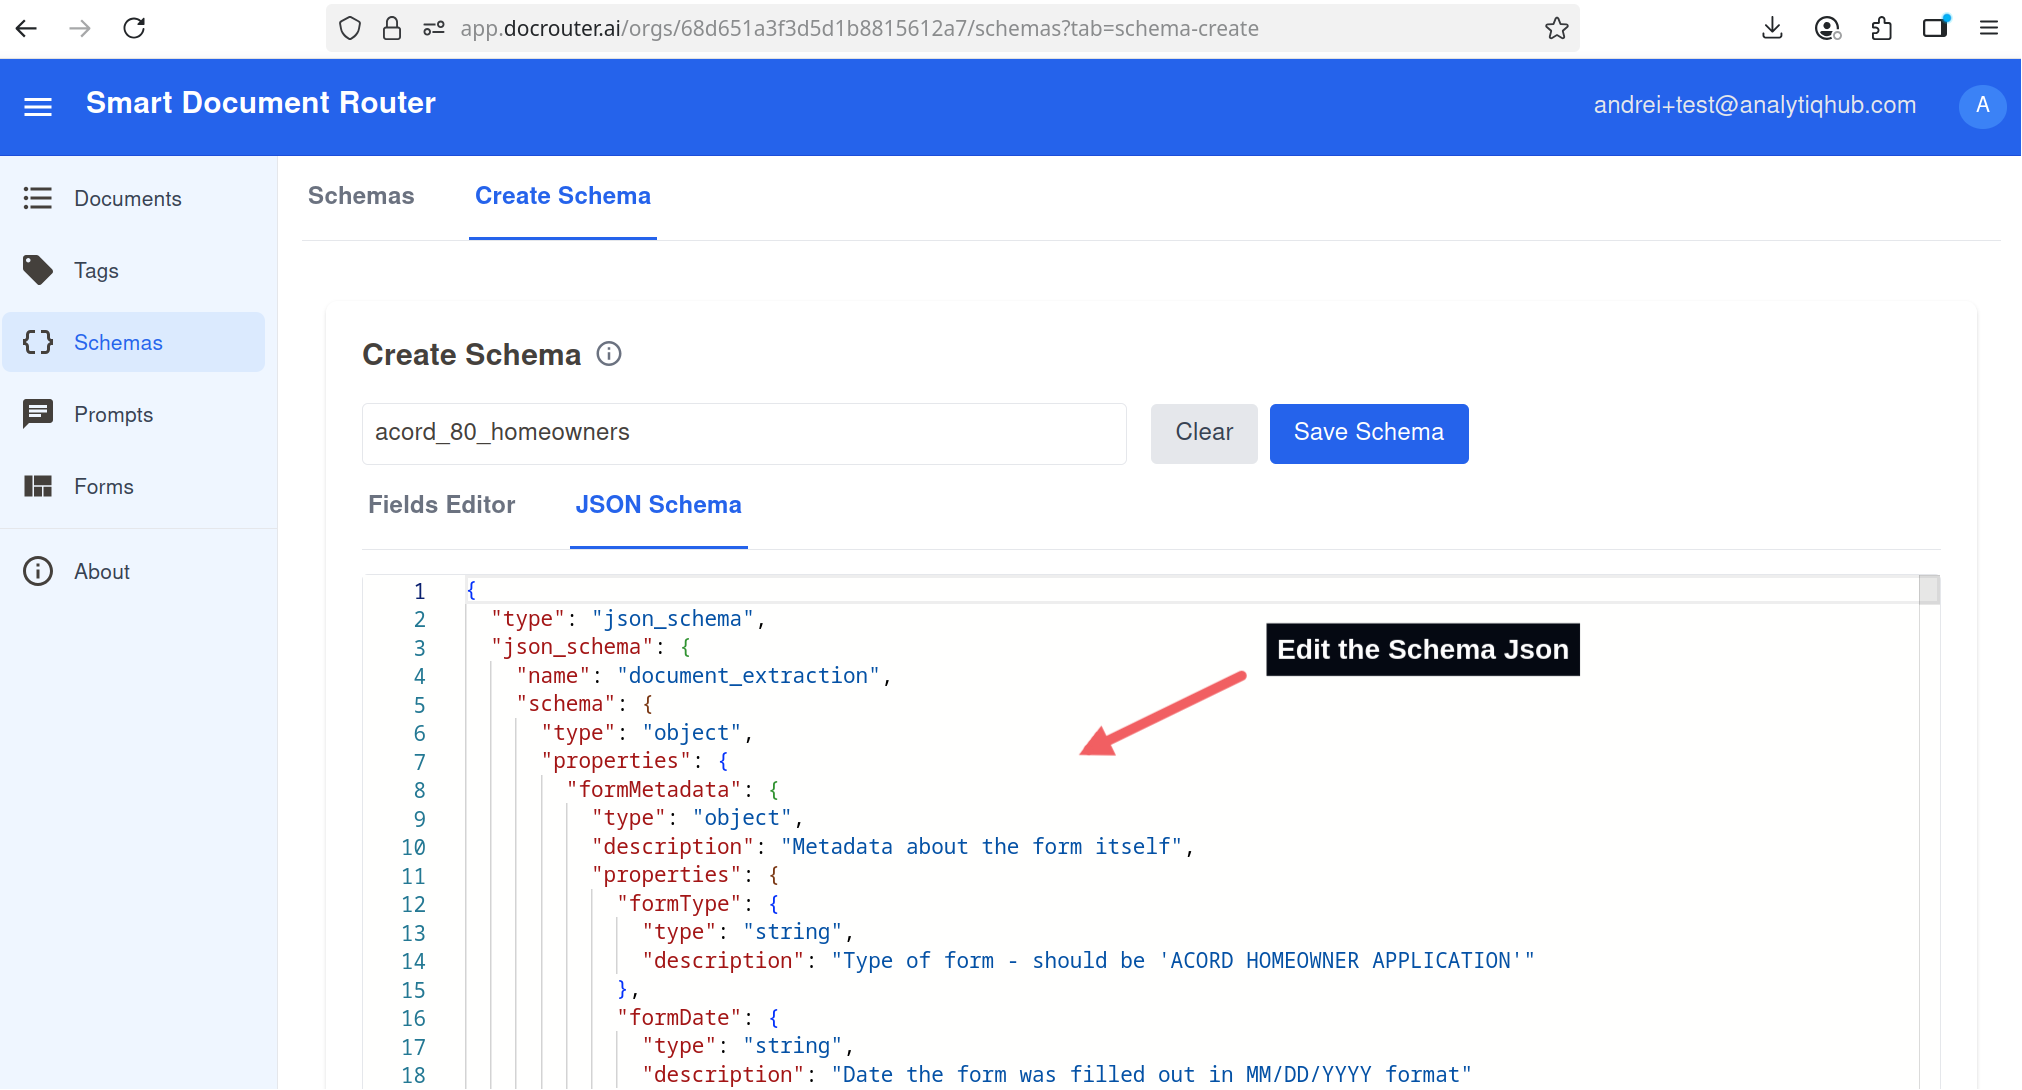
Paste the JSON schema and save.
Create a Prompt
- Go to Prompts in the left sidebar.
- Create a new prompt.
- Paste the contents of the downloaded prompt file (acord_clearance_search_prompt.txt).
- Assign the schema and tag you created so it runs only on the intended documents.
- Select one of the language models available. Gemini 2.5 Flash and GPT 4.0 Mini are good choices for simple document layouts.

Select or create a prompt and align it with your tag.
If a document is tagged at upload time, all prompts with that tag will be run automatically. However, if a prompt is added, updated or tagged after the document has been uploaded, the prompt will need to be manually run on the matching documents.
A separate mechanism, using file Actions, is available to run a new prompt in bulk on all matching documents that already exist.
Assign Tag to Existing Document
- Open the Documents list.
- Click the document three dots action menu, and select Edit Tags & Metadata.
- Add the tag linked to your prompt and save.
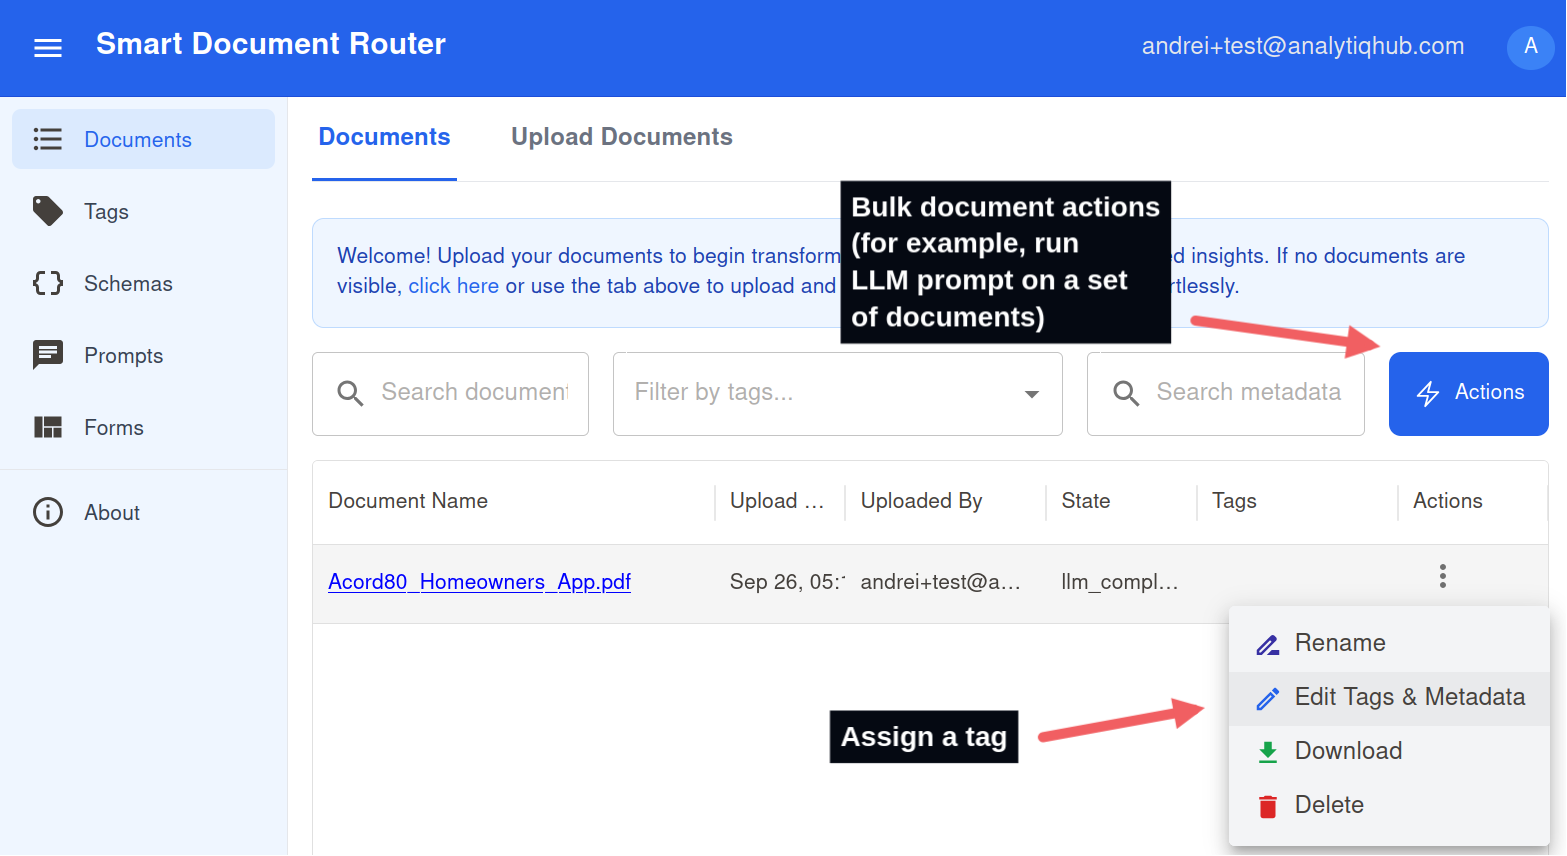
Tag existing documents to trigger the correct prompts.
Run Prompt on Document
- Open the document, and switch to the Extractions tab.
- Click spinner to (re)run prompt.
- Review extraction.
- Refine prompt, schema then re-run on similar documents to improve quality
- Optionally edit result, clicking on pencil icon.
- Export JSON or copy values into your workflow.
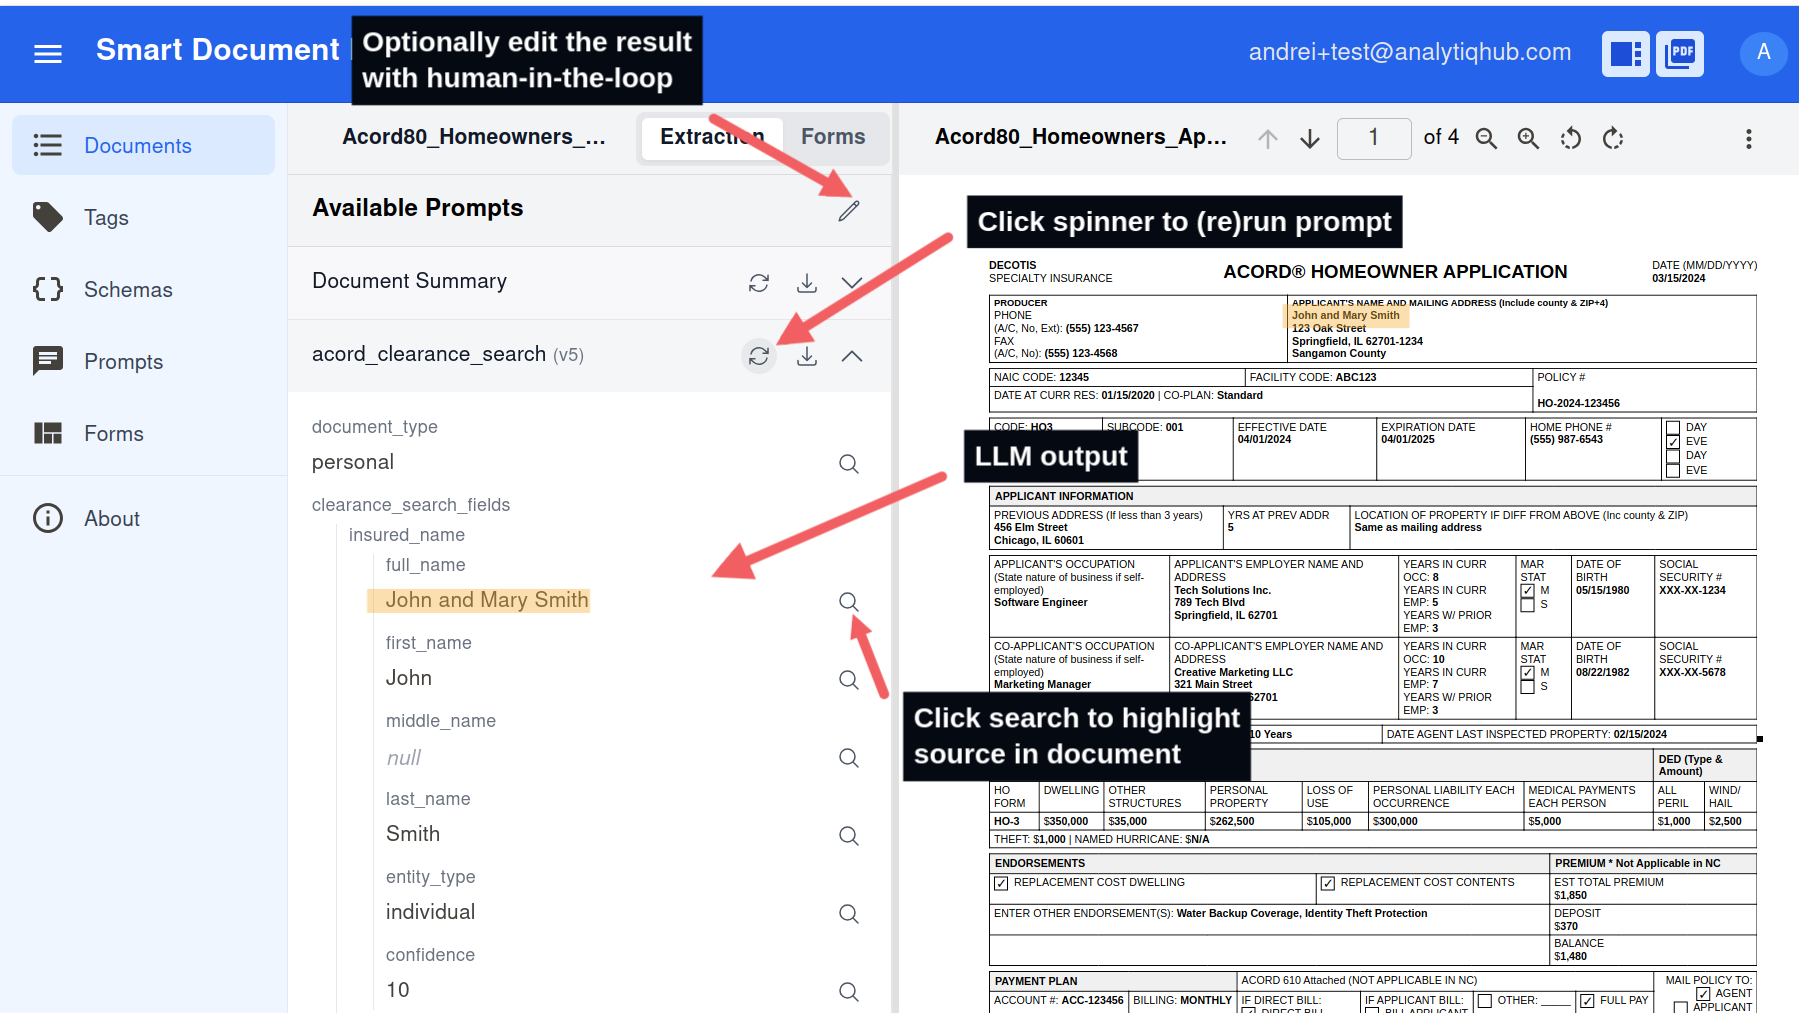
The Extractions tab shows structured results for your schema.
Iterate on prompts to improve extraction quality.
Extract the following information from this invoice:
- Invoice number
- Invoice date (format: YYYY-MM-DD)
- Vendor/supplier name
- Total amount
- All line items with descriptions, quantities, unit prices, and totals

Format the response as JSON matching the provided schema.
Be precise with numbers and dates.
Testing and Iteration
- Test with sample documents
- Review extracted data quality
- Refine schema and prompts
- Repeat until accuracy meets requirements
Leverage bulk uploads and actions for scale.
Upload pre-tagged documents at scale
- Setting the document tag at upload time
- Prompts matching the tag will run automatically.
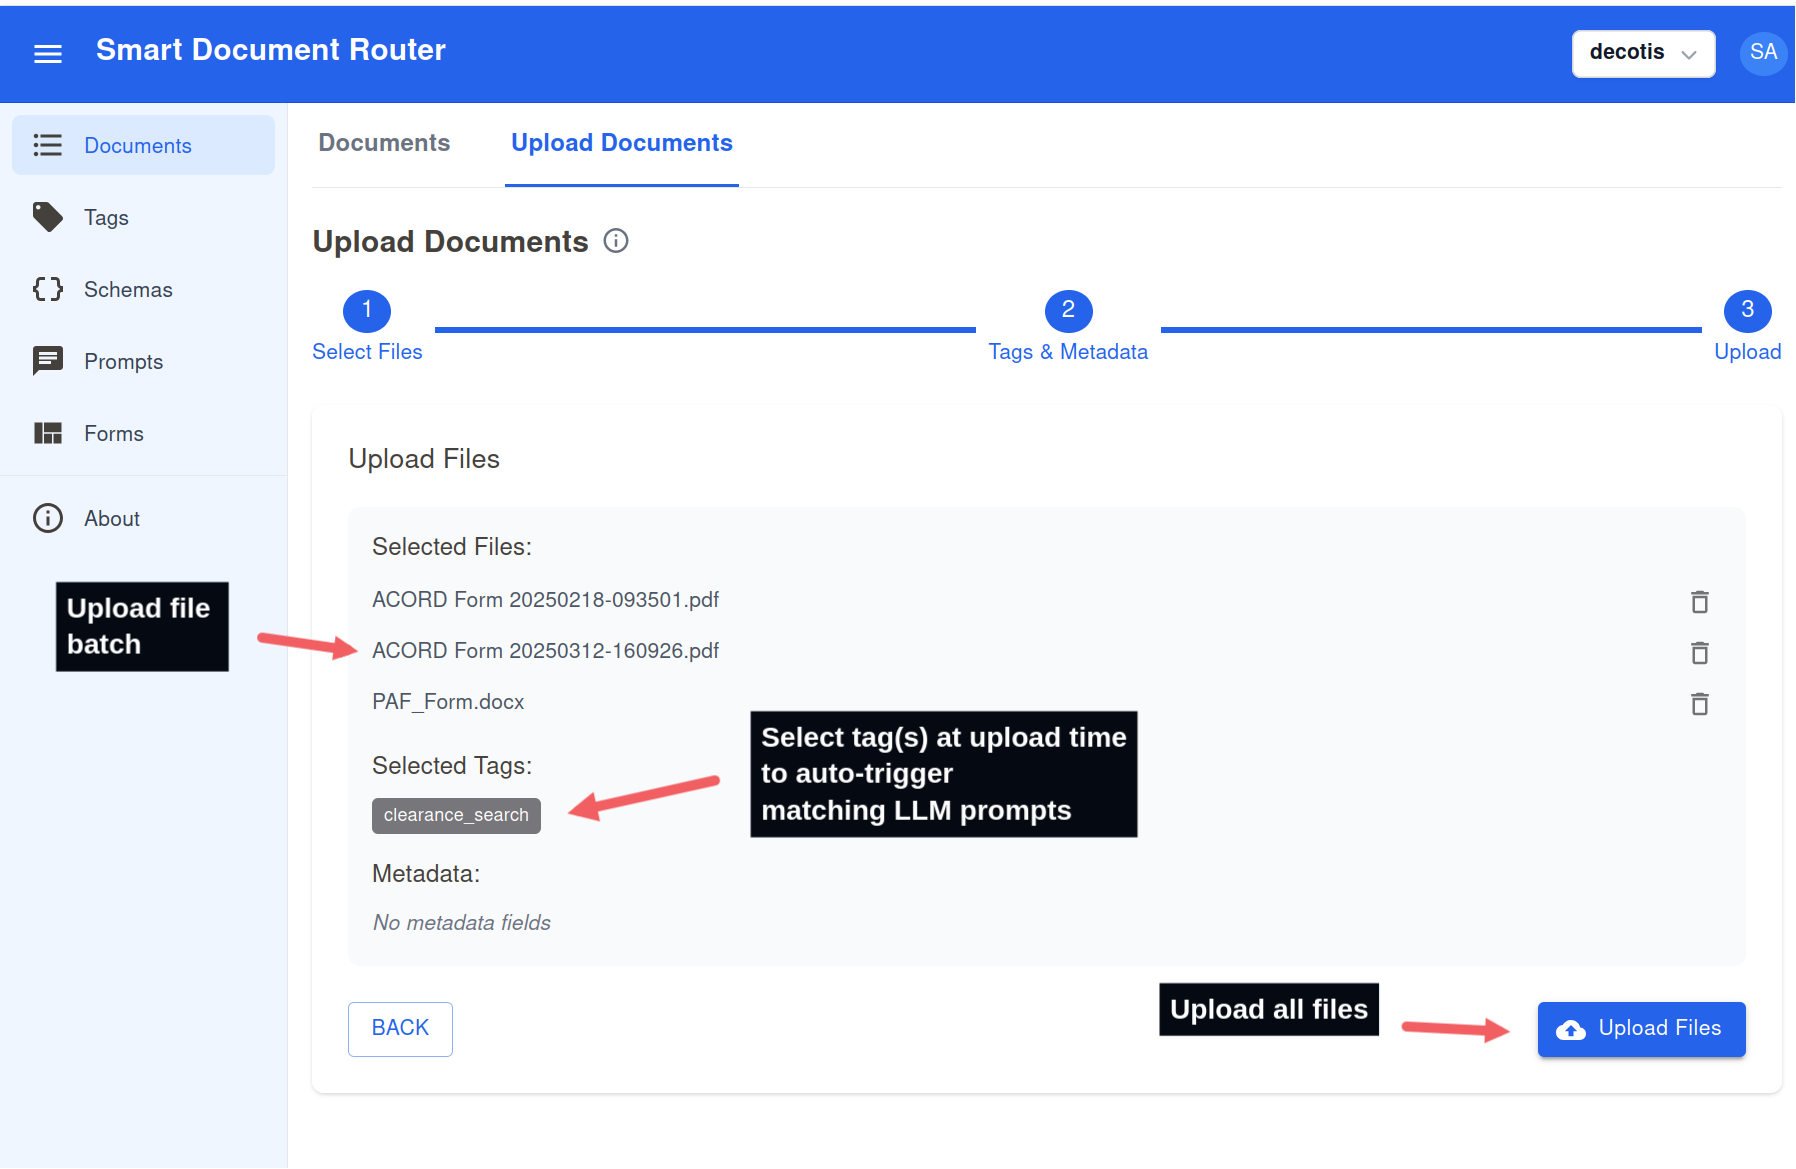
Upload many files at once and apply tags so prompts run automatically.
Update prompts and re-run on documents at scale
- Open the Documents list and filter by the tag used by your prompt.
- Click Actions → Run LLM.
- Select the updated prompt and confirm to run across all filtered documents.
- Monitor progress; re-run as you iterate on prompt or schema.
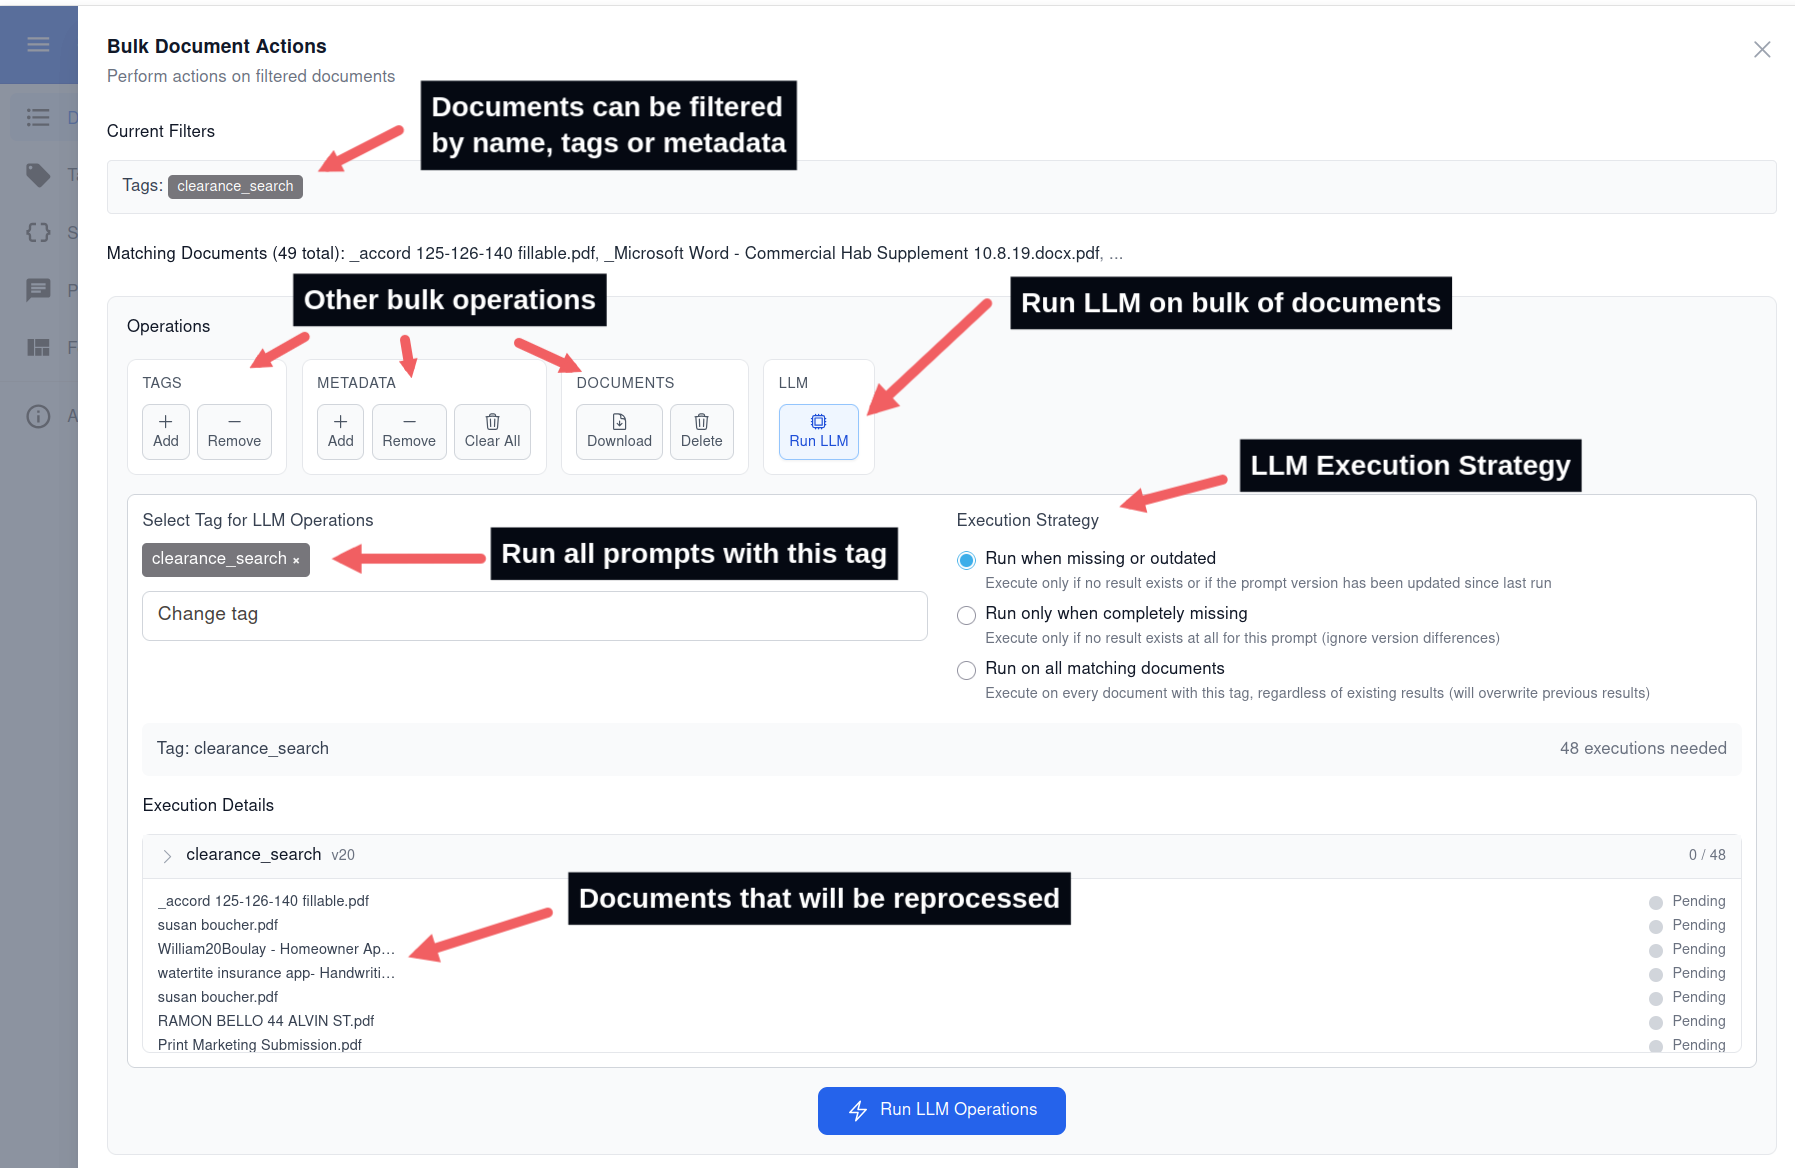
Use bulk Actions to apply an updated prompt to many documents at once.
Automate end-to-end with REST API or Python SDK.
REST API Automation
DocRouter provides REST endpoints for automated document processing. Here are the key operations:
1. Upload Documents with Tags
# Upload documents with tags for automatic processing
curl -X POST https://api.docrouter.ai/v0/orgs/YOUR_ORG_ID/documents \
  -H "Authorization: Bearer YOUR_API_KEY" \
  -H "Content-Type: application/json" \
  -d '{
    "documents": [{
      "name": "fi.pdf",
      "content": "BASE64_ENCODED_CONTENT",
      "tag_ids": ["invoice_tag_id"],
      "metadata": {"source": "api_upload"}
    }]
  }'
2. List Documents and Check Status
# List documents with filtering
curl -X GET "https://api.docrouter.ai/v0/orgs/YOUR_ORG_ID/documents?skip=0&limit=10" \
  -H "Authorization: Bearer YOUR_API_KEY"

# Get specific document details
curl -X GET https://api.docrouter.ai/v0/orgs/YOUR_ORG_ID/documents/DOCUMENT_ID \
  -H "Authorization: Bearer YOUR_API_KEY"
3. Retrieve Extraction Results
# Get LLM extraction results (wait for state: "llm_completed")
curl -X GET https://api.docrouter.ai/v0/orgs/YOUR_ORG_ID/llm/result/DOCUMENT_ID \
  -H "Authorization: Bearer YOUR_API_KEY"

# Download all results for a document
curl -X GET https://api.docrouter.ai/v0/orgs/YOUR_ORG_ID/llm/results/DOCUMENT_ID/download \
  -H "Authorization: Bearer YOUR_API_KEY"
Document Processing States:
uploaded: Document uploaded, OCR pendingocr_processing: OCR in progressocr_completed: OCR complete, LLM processing pendingllm_processing: LLM extraction in progressllm_completed: All processing complete, results availablellm_failed: Processing failed
For more details, see - REST API Documentation.
Python SDK Automation
Refer to the Python SDK Reference.
For Support: Contact our technical support team.
Ready to get started? Launch DocRouter Application or explore our REST API and Python SDK documentation.